Understanding Mini Split AC Systems
What is a Mini Split AC?
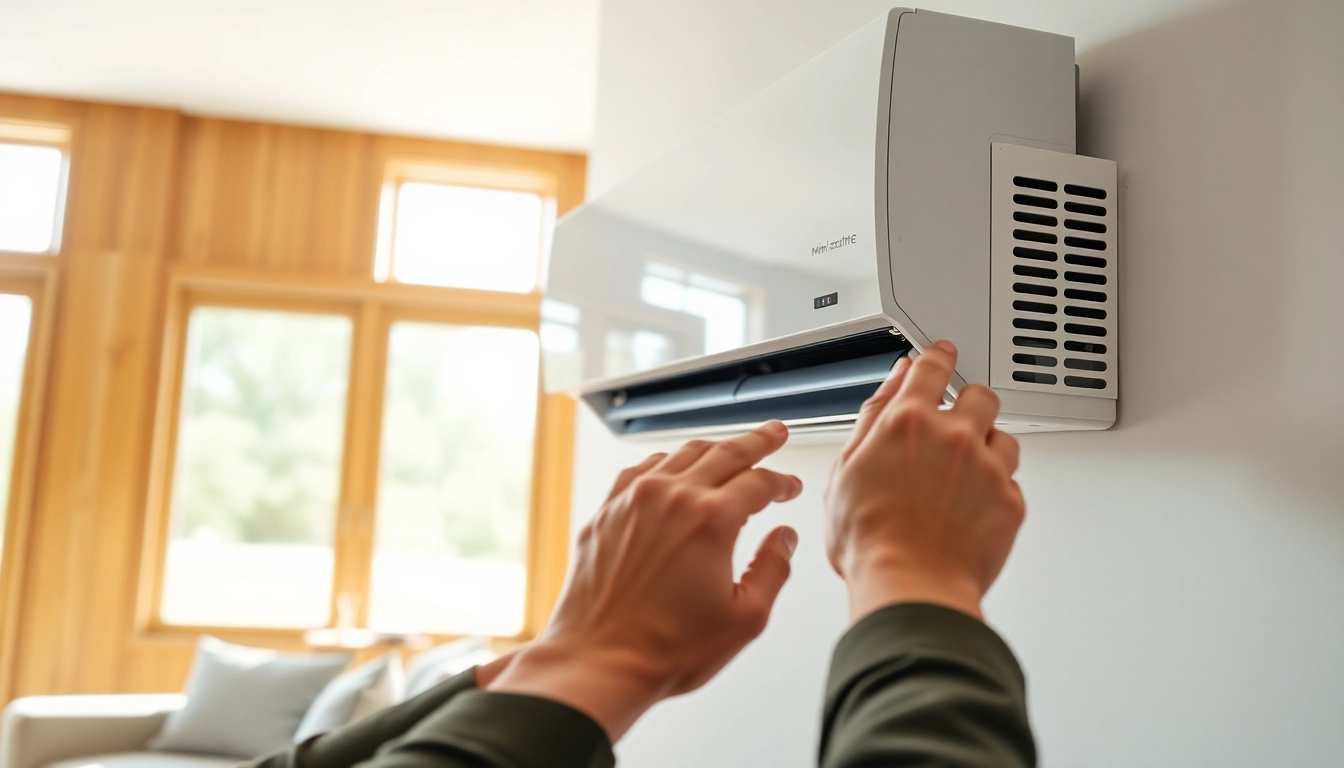
A mini split AC is a versatile and efficient cooling solution that consists of two main components: an indoor unit and an outdoor condenser. Unlike traditional central air conditioning systems, mini splits do not require ductwork, making them ideal for homes without existing ducts or for those looking to improve temperature control in specific zones. These systems are increasingly popular due to their energy efficiency, flexibility, and ease of installation. They can effectively cool or heat a room while keeping energy consumption low, which translates into cost savings on monthly utility bills. For those looking to explore options, a wide range of mini split ac systems are available for various applications.
Components of Mini Split AC
A mini split AC system is comprised of several key components that work together to provide efficient climate control:
- Indoor Unit: This part is installed within the living space and is responsible for distributing cooled or heated air. Indoor units come in various styles, including wall-mounted, ceiling-mounted, and floor-mounted options.
- Outdoor Unit: Situated outside the building, this unit contains the compressor, condenser coil, and fan. It dissipates heat absorbed from the indoor air, ensuring efficient operation.
- Refrigerant Lines: These insulated pipes connect the indoor and outdoor units, allowing for the transfer of refrigerant—a substance that absorbs and removes heat from the indoor space.
- Remote Control: Most mini split systems come with a remote control or wall-mounted thermostat, enabling users to easily adjust settings from anywhere in the room.
How Mini Split AC Works
The operation of a mini split AC revolves around its refrigeration cycle. When cooling is needed, the indoor unit absorbs heat from the room and transfers it to the refrigerant. The refrigerant is then pumped to the outdoor unit where the heat is released into the environment. The cooled refrigerant returns to the indoor unit, repeating the process. In heating mode, the cycle is reversed, allowing the system to extract heat from the outside air, even in cold conditions, and transfer it indoors.
Benefits of Mini Split AC
Energy Efficiency and Cost Savings
One of the most significant advantages of mini split AC systems is their energy efficiency. These systems use advanced inverter technology, allowing them to smoothly adjust cooling output according to the room’s conditions. As a result, mini splits consume less energy compared to traditional systems. Homeowners can expect substantial cost savings on electric bills, particularly during peak summer months when cooling demand is highest.
Flexible Installation Options
Mini split ACs offer unparalleled flexibility in installation. Since they do not require ductwork, they can be installed in virtually any space, including homes, offices, and commercial environments. Multiple indoor units can be connected to a single outdoor unit, enabling zoned cooling that can cater to different preferences in various rooms. This zoned approach not only enhances comfort but also optimizes energy usage, as users can cool only the areas in use.
Quiet Operation Features
When it comes to home comfort, noise levels can greatly impact the experience. Mini split AC systems are designed with sound-reducing technology that allows for quiet operation. The outdoor unit’s compressor is positioned away from living areas, minimizing noise disturbances. Many indoor units also feature fan settings designed to operate at low sound levels, making mini splits perfect for bedrooms, offices, or any tranquil setting.
Choosing the Right Mini Split AC
Factors to Consider
Selecting the appropriate mini split AC involves careful consideration of several factors:
- Space Size: Measure the room where you plan to install the mini split to determine the necessary cooling capacity in BTUs (British Thermal Units).
- Number of Zones: Decide whether a single-zone system suffices or if multiple zones will be necessary for comprehensive climate control.
- Efficiency Ratings: Look for Energy Efficiency Ratio (EER) and Seasonal Energy Efficiency Ratio (SEER) ratings to gauge energy performance.
- Installation Requirements: Ensure that the chosen model accommodates the installation limitations of your space.
BTU and Size Considerations
The BTU rating of a mini split AC indicates its cooling capacity. As a general rule of thumb, higher BTUs are needed for larger spaces. For accurate sizing, consider factors such as ceiling height, insulation levels, and sunlight exposure. A mini split that is too small will struggle to cool the space, while one that is too large can lead to excessive cycling, creating uneven temperatures and wasting energy.
Comparing Types of Mini Split AC
There are several varieties of mini split AC systems, including:
- Single-Zone Systems: Ideal for cooling one room or area, offering simplicity and efficiency.
- Multi-Zone Systems: Enable multiple indoor units to be connected to a single outdoor unit, perfect for larger homes needing different temperature settings in various rooms.
- Heat Pump Mini Splits: These units offer both cooling and heating, providing year-round comfort while maximizing energy efficiency.
- Ducted Mini Splits: Provide the option of connecting to existing ductwork, combining the benefits of ductless systems with traditional HVAC solutions.
Installation Process of Mini Split AC
Preparing for Installation
Preparation is key to a successful mini split AC installation. First, select the indoor and outdoor unit locations, ensuring they are positioned for optimal air circulation and accessibility for maintenance. It’s also essential to account for refrigerant line routes, electrical connections, and condensation drainage. Before starting, check local building codes to ensure compliance.
Installation Steps Explained
- Mount the Indoor Unit: Use brackets to secure the indoor unit to the wall in the selected location, ensuring proper level orientation.
- Install the Outdoor Unit: Place the outdoor unit on a stable surface, ideally elevated on a base to avoid flooding and provide airflow.
- Create Refrigerant Lines: Drill a hole through the wall to pass the refrigerant lines, electrical wires, and drain hose from the indoor to the outdoor unit.
- Connect the Lines: Securely connect the refrigerant lines and electrical wires, ensuring they are properly insulated to prevent heat loss.
- Test and Seal Connections: Once connections are made, perform a vacuum test to check for leaks and seal any gaps.
Post-Installation Tips for Performance
After installation, check the system settings and adjust the temperature to your desired level. Ensure the remote control is functioning and that airflow is unobstructed around the indoor unit. Regularly clean or replace the air filters to maintain optimal air quality and efficiency. Familiarize yourself with the programmable settings for convenient usage.
Maintaining Your Mini Split AC
Regular Maintenance Checklist
Regular maintenance of your mini split AC ensures optimal performance and longevity. Create a maintenance schedule that includes the following tasks:
- Cleaning or replacing the air filters every month.
- Inspecting and cleaning the outdoor unit from debris and vegetation.
- Checking the refrigerant lines for signs of wear or damage.
- Cleaning the drainage line to prevent clogs.
Common Troubleshooting Tips
Common issues with mini split AC systems can often be resolved with simple troubleshooting steps. If the system is not cooling effectively, check the air filters for dirt buildup, ensure the refrigerant levels are adequate, and inspect the thermostat settings. For decreased airflow, clear any blockages around the indoor unit and ensure fans are functioning properly. In cases of unusual noises, examine the outdoor unit for loose components or debris.
When to Call a Professional
While many maintenance and troubleshooting tasks can be performed by homeowners, certain issues require professional assistance. If you notice refrigerant leaks, significant energy loss, or if the system fails to start despite all checks, it’s best to contact a certified HVAC technician. Ensuring professional service for complex repairs will help maintain the system’s efficiency and prolong its lifespan.
FAQs about Mini Split AC
How efficient are mini split AC units?
Mini split AC units are very efficient, with SEER ratings often exceeding 20, leading to lower energy costs compared to traditional systems.
Can I install a mini split AC myself?
While DIY installation is possible, it is recommended to hire a professional to ensure compliance with local codes and optimal performance.
What is the lifespan of a mini split AC?
With proper maintenance, mini split AC systems can last 15 to 20 years, depending on usage and environmental conditions.
How do I clean my mini split AC?
Cleaning involves removing and washing air filters, wiping the indoor unit with a damp cloth, and making sure the outdoor unit is free of debris.
Are mini split ACs noisy?
Mini split ACs operate quietly, typically running at sound levels between 19-50 dB, making them suitable for bedrooms and quiet spaces.